Install Guide

2020-2026 Ford Super Duty Front Valance Skid Plate

2020-2026 Ford F-250, F-350, F-450, F-550, F-600
Part #JG-SUPERDUTY-VALANCE-SKID-BLK
Difficulty
Moderate
Steps
7
2020-2026 Ford Super Duty Front Valance Skid Plate
1

Safety First!

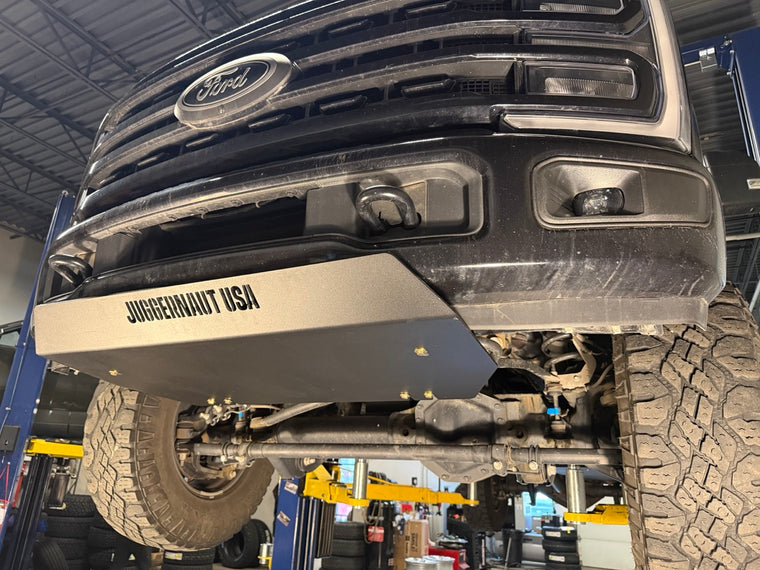
Thank you for purchasing our Juggernaut USA skid plate! This skid plate can be installed on the ground, but if you do decide to jack up your vehicle for more room to install NEVER go under the vehicle on jacks alone. Use appropriately rated jack stands to support your vehicle prior to going underneath it.
2

Remove Factory Bolts

Starting with the (2) front bracket locations there will be (8) 18mm nuts to remove as shown below. There are (2) on each side of both frame rails. The (2) bolts are connected together and will fall out of the front of the frame rail when you remove them. *See last picture as some models may use these bolts for an anti-dive crash bar, these will be removed and discarded*
Remove Factory Bolts
3

Install Front Brackets

Prior to installing the front brackets on the truck, install the (2) 3/8" clip nuts onto the brackets on a table. They go on the center of the brackets from the edge that is closest to the center hole (see picture below). Once the clip nuts are on the brackets can be installed on the vehicle. Slide the bracket so it saddles around the frame rail and lines up with the holes and re-use the hardware that was taken out in the last step. You will need to slide the flag bolts up between the bumper and the frame rail as shown below while holding the bracket in place.
Install Front Brackets
4

Install Front Brackets

Once all (4) double bolt flags are installed on the two brackets use the (8) factory nuts to secure the brackets. The holes in the frame are larger than the bolt diameter so you will have some adjustment of where the bracket ends up. Make sure both sides are evenly spaced and try to create a 90 degree angle between the frame rail and the back of the brackets. Tighten these bolts to 75 ft-lbs
🔧 Torque: 75 ft-lbs
Install Front Brackets
5

Rear Bracket Install

There is a factory crossmember just in front of the sway bar will be used to mount the rear brackets. See pictures below for bolt locations. There will be a double flag bolt on either side. The nuts will be on the front side of this crossmember, use a a 15mm socket to remove these and pull the double flag bolts out. Install (2) 3/8" clip nuts per bracket as shown below. We will be reversing the direction of these double flag bolt when installing the rear brackets. The welded "L" gusset will go so the support section points to the frame rail (see below, mirror image on the passenger side). Leave these loose for now so the brackets can move on their slots.
Rear Bracket Install
6

Skid Plate Install

Thread (4) 3/8 bolts with washers into the rear brackets. Slide the slotted rear end of the skid plate onto these (4) bolts. Use the final (2) 3/8 bolts and washer to secure the front of the skid to the front brackets. Once the skid is in place tighten the factory nuts for the rear brackets installed in the previous step. Torque these to 35 ft-lbs and then adjust the skid plate so it is even with the bumper and tighten the 3/8" bolts to 35 ft-lbs.
🔧 Torque: 35 ft-lbs
Skid Plate Install
Skid Plate Install
7

Installation Complete!

Install is now complete! Enjoy your added protection with the Juggernaut USA front skid plate!
Installation Complete!

Installation Complete

Enjoy your new Juggernaut USA skid plate. Built, fabricated & assembled in Colorado — backed for life.

Rather have us do it?

Our team installs these every week at our Wheat Ridge, CO shop. Skip the garage time — book a professional install and drive away dialed in.