Install Guide

2020-2026 Chevy Silverado 2500HD/3500HD Skid Plate Package

2020-2026 Chevrolet Silverado 2500HD, Silverado 3500HD
Part #JG-CHEVY-HD-SKID-PKG
Difficulty
Moderate
Steps
13
2020-2026 Chevy Silverado 2500HD/3500HD Skid Plate Package
1

Safety First!

These skid plates can be installed on the ground, but if you do decided to raise your vehicle with jacks ALWAYS use jack stands. Never get under vehicle on jacks alone!
2

Remove Any Factory Skid Plates

Remove any factory equipped skid plates or covers. See picture below for factory bolt locations and factory cover locations. These can be discarded along with hardware after removal.
Remove Any Factory Skid Plates
3

Install Front and Engine Skid Plates

Thread in by hand (2) M10 bolts with (2) washers into the front engine crossmember in the locations circled in red below. Use a dab of the provided blue loctite on the bolt threads as well. Only thread these in a few turns to leave plenty of threads exposed for skid plate installation.
Factory threaded holes can have burrs in them that can cause new bolts to be tough to thread in. It can be useful to hand thread bolts into all threaded locations to clean up the threads
Install Front and Engine Skid Plates
4

Install Front Skid Plate

With the (2) bolts threaded into the engine crossmember you can slide the front skid plate with the Juggernaut USA logo onto these two bolts. The rear of this skid plate is slotted so you can do so. Once the rear is slid on you can line the front two bolts up with the cross bar and install the front (2) M10 bolts with (2) 3/8 washers and dab of blue loctite on the threads. Location of the front two bolts circled below.
Use Blue Loctite on Bolt Threads
Install Front Skid Plate
5

Install Engine Skid Plate

Slot the front end of the engine skid plate above the front skid plate installed in the previous step and use the provide (2) M10 bolts and (2) washers to secure the back of the engine skid plate. Location of these two bolts circled in red below. If you are installing the transmission skid plate leave all these bolts loose until the end. If you are only installing the engine skid plate package you can torque all these bolts to 25 ft-lbs and your installation is now complete!
🔧 Torque: 25 ft-lbs
Use Blue Loctite on Bolt Threads
Install Engine Skid Plate
6

Transmission Skid Plate Install

The transmission skid plate will come with a rectangular steel flag nut with a M10 rivnut pre-installed into it. This must be placed into the transmission crossmember prior to skid plate installation. There are three holes in for the transmission mount and you want the rivnut to line up with the center of the passenger side most slot. See pictures below for location.
Transmission Skid Plate Install
7

Transmission Skid Plate Install

The front of the transmission skid plate is slotted. Slide these into the already installed (2) M10 bolts and washers at the rear of the engine crossmember. The front of the transmission skid plate will go above the engine skid plate.
Use Blue Loctite on Bolt Threads
Transmission Skid Plate Install
8

Transmission Skid Plate Install

With the transmission skid held in the front, push the rear of the skid up to the transmission crossmember and use the provided (3) M10 bolts and washers to secure the skid into the factory 3 holes on the drivers side of the crossmember. Only turn these a few turns to hold the skid plate in place.
Use Blue Loctite on Bolt Threads
Transmission Skid Plate Install
9

Transmission Skid Plate Install

We have added an access cutout next to the rear drivers side hole in the transmission skid (not shown in photo below) so you can hold the tail end of the flag nut to align it with the hole in the skid plate. Hand thread the provided M10 bolt and washer into this flag nut. DO NOT leave your fingers in the access cutout to tighten this bolt, only to aid in starting the threads. The flag nut will turn on its own and lock into place when tightened. If you are not installing the transfer case skid you can tighten all bolts now to 25 ft-lbs.
🔧 Torque: 25 ft-lbs
Use Blue Loctite on Bolt Threads
Transmission Skid Plate Install
10

Transfer Case Skid Install

Before installing the skid plate place the provided (2) M10 serrated flange nuts into the torsion bar crossmember in the locations shown below.
Transfer Case Skid Install
11

Transfer Case Skid Install

The front side of the transfer case skid plate is slotted to slide into the (3) rear most bolts on the transmission crossmember. If you have not installed those (3) bolts in washers do that now and slide the front of the skid into place. This skid will go under the transmission skid plate.
Use Blue Loctite on Bolt Threads
Transfer Case Skid Install
12

Transfer Case Skid Install

While reaching up into the torsion bar crossmember to hold the serrated flange nuts in place thread in (2) M10 bolts and washers into the nuts with the rear of the skid plate up against the crossmember.
Use Blue Loctite on Bolt Threads
Transfer Case Skid Install
13

Tighten All Bolts

Tighten all bolts to 25 ft-lbs and the installation is complete! Enjoy your new Juggernaut USA skid plates
🔧 Torque: 25 ft-lbs
Tighten All Bolts

Installation Complete

Enjoy your new Juggernaut USA skid plate. Built, fabricated & assembled in Colorado — backed for life.

Rather have us do it?

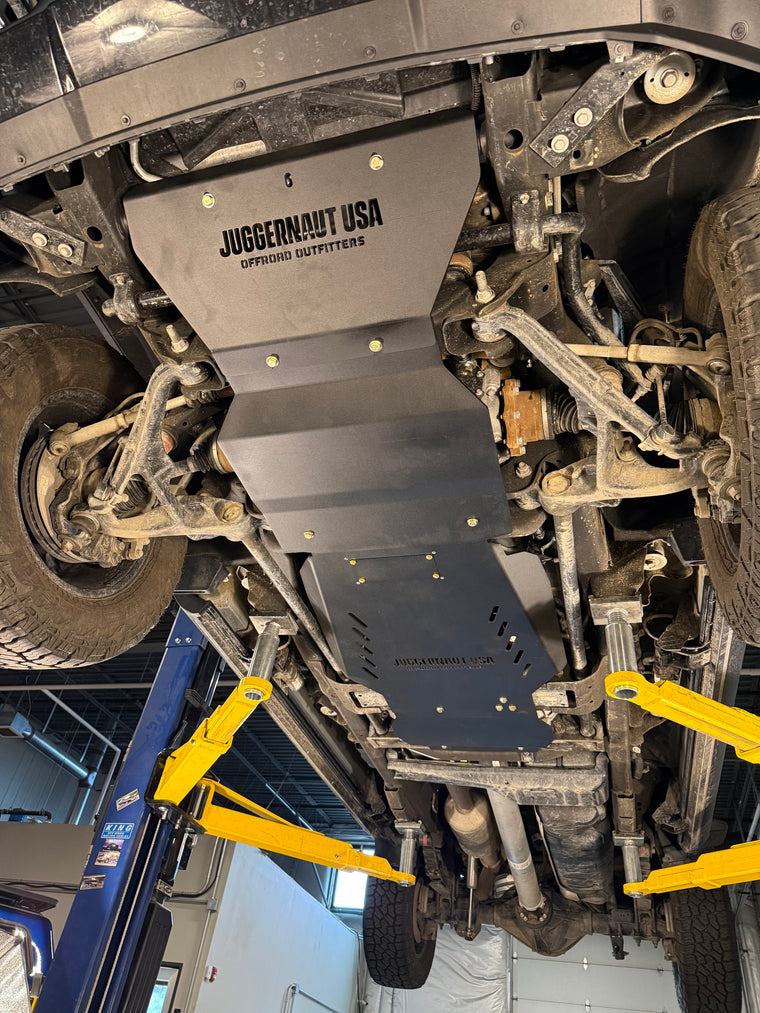
Our team installs these every week at our Wheat Ridge, CO shop. Skip the garage time — book a professional install and drive away dialed in.