Install Guide

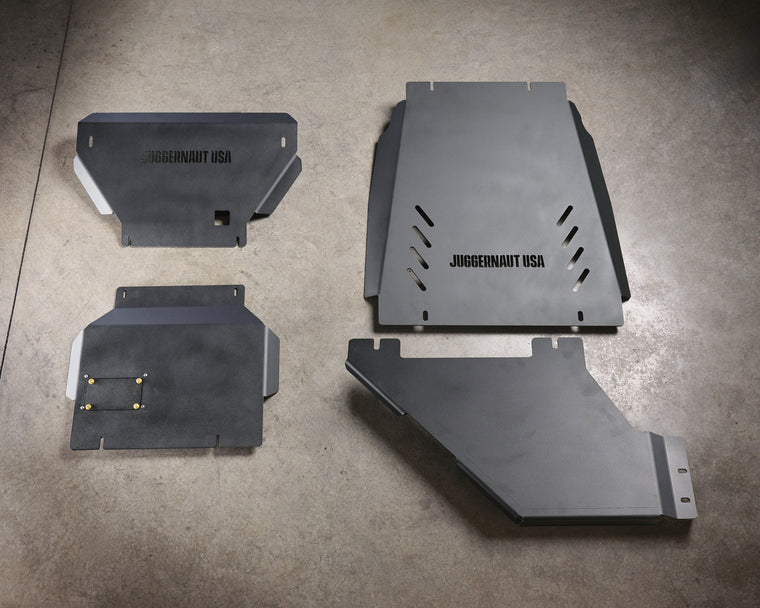
2024-2026 Toyota Tacoma Full Skid Plate Package

Difficulty
Moderate
Steps
13
1

Safety First!

The skid plates can be installed on the ground, but if you do decide to jack up your truck to get more room for the install ALWAYS use jack stands. Never go underneath your truck on jacks alone.
2

Remove Factory Splash Guards

If your truck is equipped with any factory splash shields or skid plates they must be removed prior to installation of the Juggernaut skid plates. These factory splash guards can be removed with a 12mm socket. These bolts will not be re-used as our skids come with all new hardware.
3

Front Bracket Install

Before installing the (2) steel front mounting brackets on the vehicle, install the provided (2) M10 clip nuts on the brackets in the orientation shown. It can be helpful to press them as far as you can by hand and then press the clip nut end on a flat surface to get more leverage. The clip nut will snap into place around the hole when seated correctly.
Front Bracket Install
4

Front Bracket Install

Using a 17mm socket remove the (4) factory bolts holding in tow hooks (on different trims these tow hooks may look different, but all will be in same location). Insert the slotted end of the front brackets between the tow hook and the frame as shown below. Leave these bolts loose enough so that you can still slide the brackets freely on the slots.
Front Bracket Install
5

Engine Skid Plate Install

*If you are installing a transmission skid as well you will need to install the rear crossmember spacer. If you are only installing the engine skid plate package it will NOT come with a spacer* The transmission spacer has offset holes and the longer distance from the edge of the spacer to the mounting hole will go on the drivers side as shown below. Install this with the provided (2) M8 bolts and washers in the locations shown circled. Only leave these bolt threaded in a few turns so you can slide the skid onto it.
Engine Skid Plate Install
6

Engine Skid Plate Install

The rear of the engine skid plate has slotted holes so that you can slid it onto the (2) bolts installed in the last step. If you do have the transmission spacer installed this skid will go on top of the spacer. Secure the front with the provided (2) M8 bolts and washers in the threaded frame holes shown below. Only thread in the front (2) bolts a few threads to leave room for the front skid plate install.
Engine Skid Plate Install
7

Front Skid Plate Install

With the engine skid plate installed you can now slide the slotted rear end of the front skid plate onto the front (2) M8 bolts. This skid will go on top of the engine skid as shown below. Using the provided (2) M10-1.5 partially threaded bolts with a dab of blue loctite on the threads and (2) M10 washers line up the front steel brackets with the slots on the front of the front skid. If installing other skid plates leave all bolts loose until the end. If only installing the engine skid plate package torque the bolts to the following specifications: M8 bolts - 25 ft-lbs, M10 bolts - 35 ft-lbs, factory tow hook bolts 75 ft-lbs.
Front Skid Plate Install
8

Transmission Skid Plate Install

With the transmission spacer installed on the rear of the engine crossmember with (2) M8 bolts and washers the front slots of the transmission skid plate will slide onto these bolts on top of the spacer plate. If you have the engine skid the transmission skid will slot in between the spacer and the engine skid plate.
Transmission Skid Plate Install
9

Transmission Skid Plate Install

Once front of transmission skid is slotted onto front (2) M8 bolts hold the rear of the skid plate up to the rear crossmember. If you are installing the transfer case skid no rear spacers will be used, if not installing transfer case skid use provided (2) 1/4" aluminum spacers on each of the rear bolts between the skid plate and the crossmember. Using the provided (2) 1/2" x 3.75" bolts with a washer at the bolt head and one on top of the crossmember use the serrated flange nut to secure the through bolts on top of the crossmember. Leave these loosely threaded for now.
Transmission Skid Plate Install
10

Transmission Skid Plate Install

If you are not installing the transfer case skid plate you can tighten the transmission skid plate bolts. The front (2) M8 Bolts will be torqued to 25 ft-lbs. The rear 1/2" bolts can be tightened using a 19mm socket and wrench on the nut on top of the crossmember to 45 ft-lbs.
11

Transfer Case Skid Plate Install

Slide the front two slotted holes onto the 1/2" x 3.75" through bolts between the transmission skid plate and the transmission crossmember.
Transfer Case Skid Plate Install
12

Transfer Case Skid Plate Install

With the front of the transfer case skid plate held by the front (2) bolts line the drivers side flange with the factory hole on the outside of the frame rail shown in the picture. This will use the provided (1) M10-1.25 fine thread, fully threaded bolt with a M10 washer. Hold the skid plate up so that the rear flange sits against the bottom of the frame rail. Tighten this M10 bolt to 35 ft-lbs. Tighten transmission crossmember through bolts to 45 ft-lbs.
Transfer Case Skid Plate Install
13

Skid Plate Install Complete!

Thank you for purchasing Juggernaut USA skid plates! Enjoy your new truck protection! If you have any questions feel free to reach out to sales@juggernautusa.com or give us a call at 970-341-4221!
Skid Plate Install Complete!

Installation Complete

Enjoy your new Juggernaut USA skid plate. Built, fabricated & assembled in Colorado — backed for life.

Rather have us do it?

Our team installs these every week at our Wheat Ridge, CO shop. Skip the garage time — book a professional install and drive away dialed in.