Install Instructions
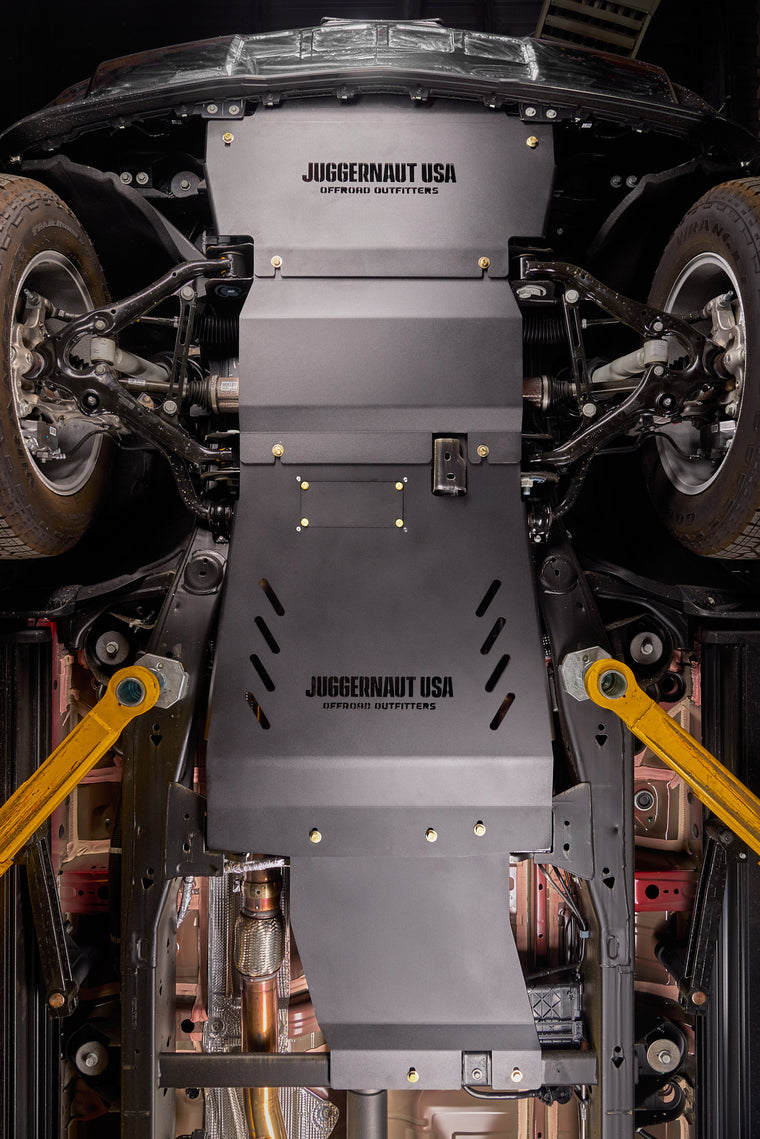
2019-2026 Chevy Silverado 1500 Skid Plate Package
2019-2026 Chevy Silverado 1500
Part #JG-CHEVY-SIERRA-PKG
View Product
Included Products
Chevy Silverado 1500 Engine Skid Plate
Chevy Silverado 1500 Transmission Skid Plate
Chevy Silverado 1500 Transfer Case Skid Plate
Included Hardware
- *Full Package Hardware*
- - (4) M8 x 35mm Bolts
- - (4) M8 Washers
- - (4) M8 Clip Nuts
- - (7) M10 x 40mm Bolts
- - (7) M10 Washers
- - (7) M10 Clip Nuts
- - (4) 1/2" x 3.5" Bolts
- - (4) 1/2" Serrated Flange Nuts
- - (4) 1/2" Stainless Steel Washers
- - (1) Bottle of Blue Loctite
Installation Steps
1
Safety First!
Thank you for purchasing our Juggernaut USA skid plate! This skid plate can be installed on the ground, but if you do decide to jack up your vehicle for more room to install NEVER go under the vehicle on jacks alone. Use appropriately rated jack stands to support your vehicle prior to going underneath it.
2
Remove Factory Guards (If Applicable)
Depending on your model of truck you may have some plastic and thin metal guards on your truck as shown below. These will need to be removed prior to installing our skid plates. The engine guards use a M8 bolt that takes a 13mm socket and the transfer case guard uses M10 bolts that require a 15mm socket to remove the bolts. This hardware and guards will not be re-used.
3
Engine Skid Plate Install
The first step will be to install (2) M10 clip nuts onto the (2) steel brackets in the orientation shown below. It is helpful to do this on a table before installing the bracket on the vehicle. Once the clips are installed the steel brackets will be mounted to the frame with (4) 1/2" x 3.5" bolts, (4) 1/2" washers, and (4) 1/2" serrated flange nuts. Leave these hand tight until the front skid plate is mounted.
*On the 3.0L Diesel and 2.7L Turbo I4 there will be an additional radiator and plastic shrouds as shown in the last picture. The install is the same, but there is less space*
Use blue loctite on end of 1/2" bolt threads
4
Engine Skid Plate Install
Next step will be to install the provided clip nuts. There may be factory clip nuts left after removing any factory guards, but we suggest you remove those with a flathead screw driver and replace them with ours. There will be (4) M8 clip nuts that will need to be installed in the locations shown below.
5
Engine Skid Plate Install
Next the front most skid plate will be installed with (2) M10 bolts and washers connecting it to the steel front brackets and (2) M8 bolts and washers connecting it to the front engine crossmember. Slide the front of the skid plate just above the front bumper lip and install the (2) M8 bolts and washers with a blue loctite and then the (2) M10 bolts and washers with blue loctite. Leave the M8 bolts only threaded a few turns in to leave room for the next skid to be slid into place.
Use blue loctite on all bolts going into clip nuts
6
Engine Skid Plate Install
The engine skid plate can now be installed behind the front skid plate. The front of this skid plate is slotted so it can be slid above the front skid plate installed in the previous step. The rear will be secured by (2) M8 bolts and washers with blue loctite in the locations shown below.
If you are only installing the engine skid package torque these bolts to 35 ft-lbs for M10 and 1/2" bolts and 25 ft-lbs for M8 bolts. If installing more skids leave them loose for now.
Torque: M10 or 1/2" 35 ft-lbs -- M8 25 ft-lbs
Use blue loctite on all bolts going into clip nuts
7
Transmission Skid Plate Install
There may be factory clip nuts installed at the transmission crossmember, we recommend that you remove these with a flathead screwdriver and use the ones provided in our kit. There will be (3) M10 clip nuts installed in the locations shown below. The front of this skid will use M8 clip nuts installed in previous steps.
8
Transmission Skid Plate Install
The front of the transmission skid plate is slotted. Install (2) M8 bolts and washers into the engine crossmember if not already installed in engine skid plate install. Slid the front of the transmission skid above the engine skid plate and use (3) M10 bolts and washers with blue loctite to secure the rear of the skid.
If installing transfer case skid plate leave these bolts loose, if not torque M10 bolts to 35 ft-lbs and M8 bolts to 25 ft-lbs.
Torque: M10 35 ft-lbs -- M8 25 ft-lbs
Use blue loctite on all bolts going into clip nuts
9
Transfer Case Skid Plate Install
The transfer case take (5) M10 clip nuts shown in the locations below. If you installed the transmission skid in the previous step the front (3) clip nuts will already be installed.
10
Transfer Case Skid Plate Install
The transfer case skid plate will be installed above the rear of the transmission skid plate. Use the provide (5) M10 bolts and washers with blue loctite to install the transfer case skid plate.
Torque bolts to 35 ft-lbs.
Torque: 35 ft-lbs
Use blue loctite on all bolts going into clip nuts
11
Thank You!
Thank you for purchasing a Juggernaut USA product and enjoy!
Need Help With This Install?
Our team is happy to help over the phone, or bring your vehicle to our Wheat Ridge, CO shop for professional installation.